Zoom meetings can move fast. Whether it’s a client call, a training session, or a team update, you don’t always catch everything in the moment. Recording the meeting makes it easier to replay what was said, double-check details, or share it with someone who missed it. But the way you record depends on your setup. Here's every method that works—across Windows, macOS, iOS, and Android—without stretching things out or circling back to points already made.
How to Record a Zoom Meeting on PC, Mac, iPhone, and Android [Best Tools & Methods
Recording with Zoom’s Built-In Recorder (PC & Mac)
If you're the host or have been given permission, Zoom’s built-in recorder does the job with one click. Once the meeting starts, a “Record” button appears in the toolbar. Click it, and the recording begins right away. A small icon appears so you know it’s working. Once the meeting ends, Zoom processes the file and saves it to your device, usually in the Zoom folder inside “Documents.”
The recording is in MP4 for video and M4A for audio, and plays without needing to convert anything. It’s simple, reliable, and doesn’t need extra software.
Recording to the Cloud via Zoom (Paid Zoom Plans Only)
With a paid Zoom plan, you get access to cloud recording. During the meeting, hit "Record" and choose "Record to the Cloud." That's it. When the meeting ends, Zoom stores everything online. You'll get an email with a link to view or download the file once it is ready.
This option also comes with automatic transcription (if enabled) and keeps your recordings organized in your Zoom account. It doesn't use your computer's storage, and you can access the recordings from any device with your Zoom login.
Recording with Xbox Game Bar (Windows)
If you're a participant without host permission, Zoom won’t let you record directly. In that case, use Xbox Game Bar, which comes pre-installed on most Windows systems. Press Win + G to open it, then hit the record button. It captures everything on the screen, including the Zoom window, and saves it in the “Videos” folder under “Captures.”
There’s no watermark, no time limit, and the quality is decent for meetings. Just keep the Zoom window active while recording.
Recording with QuickTime Player (Mac)
For Mac users, QuickTime Player is an easy fix when you don't have recording rights. Open the app, choose "File," then "New Screen Recording." It lets you record either your full screen or just a portion. Start the Zoom meeting, press record, and it captures the session until you stop it.
The recorded file is saved in .mov format, which can be opened in QuickTime or converted if needed. If you're using headphones, make sure to adjust settings to include system audio, or it may only record silence.
Recording with OBS Studio (Windows & Mac)
OBS Studio works well for those who want more control. It’s free, open-source, and runs on both Windows and macOS. You can choose which part of the screen to record, adjust audio sources, and save the file in multiple formats.
Start OBS, set up a display capture, and hit “Start Recording.” It’s widely used for streaming but works just as well for Zoom calls. Files are saved locally, and you can tweak the resolution and bitrate if you care about file size or quality.
Recording with AZ Screen Recorder (Android)
Android doesn’t let you record Zoom meetings natively. But AZ Screen Recorder is one of the easiest ways around that. Download it from the Play Store, open the app, and allow the required permissions. It places a floating icon on your screen. Start the Zoom meeting, tap the record icon, and it captures both video and audio.
The app records in high resolution and saves the file locally. There’s no watermark, no time limit, and you can pause or resume recording mid-meeting. It also offers internal audio capture on newer Android versions, but double-check your settings, as device support varies.
Recording with Mobizen (Android)
Mobizen is another solid option for Android users. It works similarly to AZ Screen Recorder but comes with built-in editing tools. After launching the app, it shows a small overlay. Start your Zoom call, tap record, and Mobizen handles the rest.
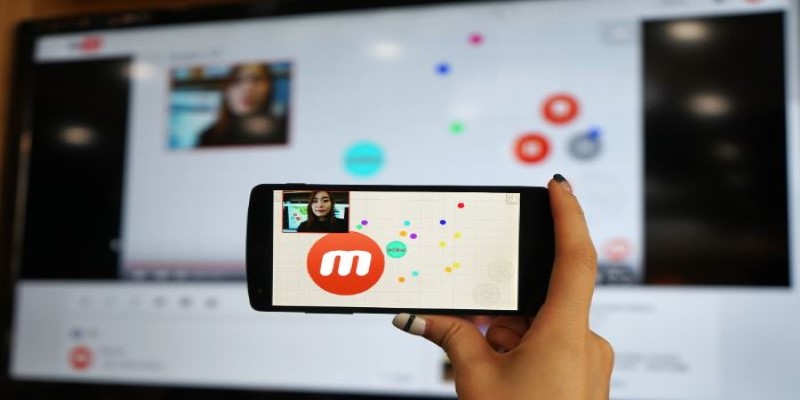
The video is saved on your device, and you can trim or crop it right from the app. It's beginner-friendly and works well on most Android phones, especially for those who don't want to deal with a complex setup.
Recording with iOS Screen Recorder (iPhone & iPad)
Zoom doesn't allow local recordings on iOS unless you have a paid plan and host access. However, iPhones and iPads come with built-in screen recorders. First, make sure it's enabled in Control Center settings. Once your Zoom meeting starts, swipe to open Control Center and tap the record button.
It starts a countdown and then captures everything on screen. Files are saved in the Photos app. Keep your mic on if you want your voice included. Just remember, internal Zoom audio might not be recorded unless your mic is active, due to iOS limitations.
Recording with Zoom Cloud Recording on iOS
If you’re the host and using a paid Zoom account on iOS, you can use Zoom’s cloud recording just like on desktop. Tap “More” in the Zoom app during the call and select “Record to the Cloud.” Once the meeting ends, Zoom processes the file and sends you a link by email.
It works reliably, doesn’t require device storage, and is your best bet for high-quality audio and video on mobile if you meet the plan requirements.
Done Right, Every Time
Recording a Zoom meeting isn’t about one perfect tool. It’s about choosing what fits your device, access, and whether or not you're hosting the meeting. There’s always a way—sometimes it’s built-in, sometimes it’s a workaround. Once you know your setup, you won’t have to worry about missing anything next time.
